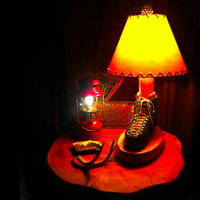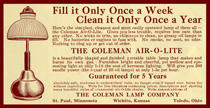


 How to Clean an Old Coleman® Lantern or Stove
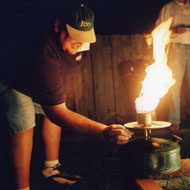
Knowing how to clean an old lantern or stove is real important. You can destroy the value and/or functionality of your Coleman® by using the wrong method or chemical cleaners.
The cleaning agents and acids described in this chapter are common household products that you probably already have. If you have concerns about their safe use, please refer to our Safety Data Sheet (SDS) pages.
Understand that it is easier to clean an individual part than an assembled lantern or stove. Trying to clean the inside of a bare metal lantern frame still mounted on a painted fount is possible, but difficult.
Jump to glass * painted founts * nickel-plated founts * bare metal * electrolysis
Cleaning porcelain enamel. The ventilator on your lantern is steel coated with porcelain enamel. It cannot be painted and is easily scratched. Use warm soapy water and a soft cloth or sponge to clean it. DO NOT use an abrasive scrubber or chemical as you will scratch it and destroy luster.
Jump to porcelain *painted founts * nickel-plated founts * bare metal * electrolysis
Cleaning glass. Use warm soapy water and a soft rag to clean lamp shades and lantern globes. Use abrasive scrubbers with caution. If there are spots on the glass, try to get them off with a plastic knife or your fingernail.
If you have a white fuzzy mark in your globe, it will not come out. They are caused by running a lantern with a hole in the mantle.
If you have dark spots that won't come off with soap and water, you can try Lime-Away® (sulfamic acid). Use rubber gloves and coat the globe inside and out. The glass will become very slick so don't drop it. Allow it work 15 minutes or so. Be careful as the glass will get slick. Rinse it well with water and dry with a soft cloth.
Jump to porcelain * glass * nickel-plated founts * bare metal * electrolysis
Cleaning a painted fount or tank. You can treat the paint on a lantern fount or stove tank just like you would the paint job on your car. First spray it down with a good household cleaner like Simple Green® and let it soak for a bit. Then take a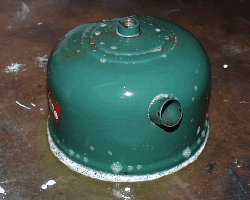 damp rag and clean the dirt and grime from the paint. If your lantern has a decal on it, be very careful as you can clean the lettering right off. Stove tanks will take a little more effort as they usually have a good coat of grease on them. Use a stiff brush to get into the seam. Clean the fuel filler cap the same way if it is painted.
Now is a good time to clean the pump cylinder. Spray carburetor cleaner directly into the cylinder and scrub with a rifle bore brush or similar 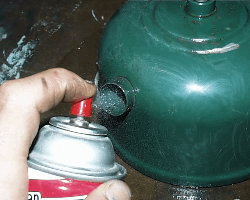 to remove the old oil and dirt. Turn the fount upside down to drain the spray, then spray the cleaner up into the cylinder to remove the residue. Repeat as necessary until the pump cylinder walls are smooth to the touch.
If the paint is badly oxidized, use an automotive rubbing compound. Spray a little cleaner into the rubbing compound to make it spread a little easier and then rub the fount/tank as you would your car. DON’T RUB THIS ON THE DECAL. When 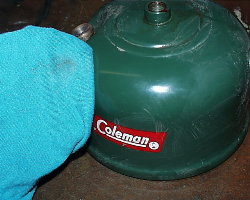 done, remove the rubbing compound with a clean dry rag. If it dries and is difficult to remove, shoot it with cleaner to loosen it back up.
Finally, you can use car wax for nice shine. If you have an imprinted logo on the fount, use a soft toothbrush to remove the wax. Don’t forget to avoid that decal!
![]() Acids can burn you. Please use with caution and read the manufacturer’s warning labels before using. Click here to access our Safety Data Sheet (SDS) pages for additional information.
Acids can burn you. Please use with caution and read the manufacturer’s warning labels before using. Click here to access our Safety Data Sheet (SDS) pages for additional information.
Jump to porcelain * glass * painted founts * bare metal * electrolysis
Cleaning a nickel-plated fount. Time can take its toll on nickel plate. A lamp or lantern that has been sitting in a dirty, damp environment for 50 years can really be a mess. Unless the water and/or chemicals have destroyed the plating, it can usually be returned to some sort of shine with a little work.
 First, start with a good washing. Spray it with a good household cleaner like Simple Green® and allow it to soak for a while. Use a soft brush and a clean rag to remove as much dirt and grime as you can.
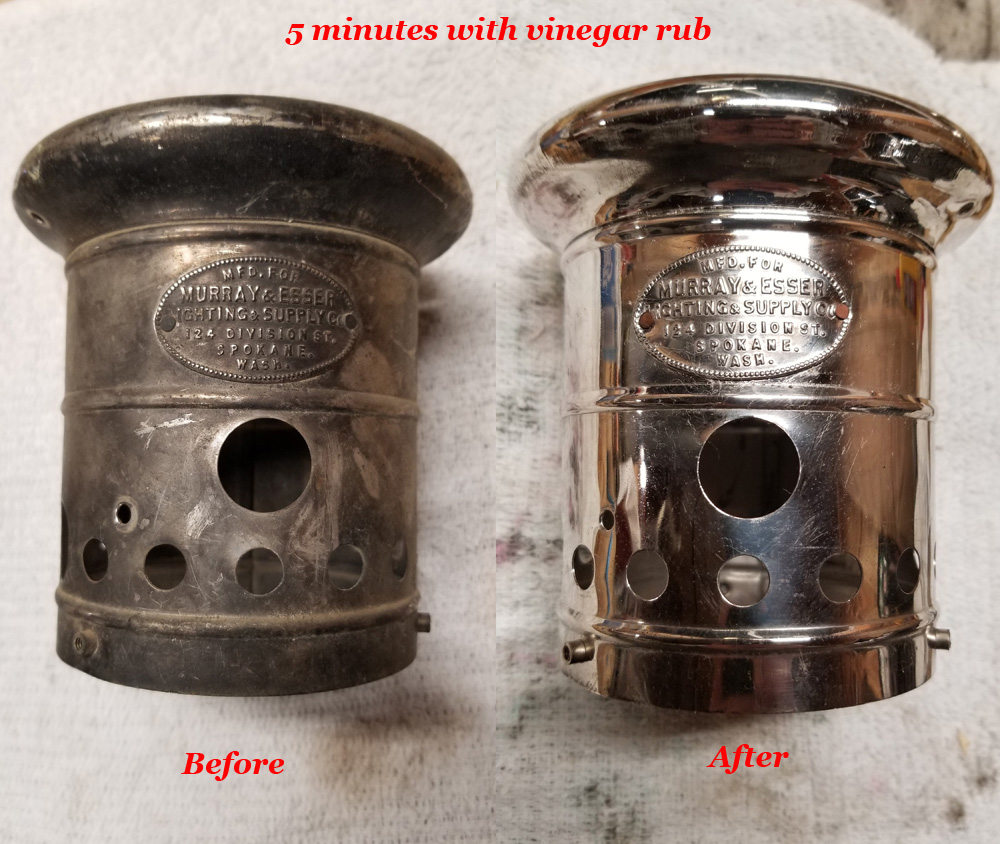
If the brilliant luster is gone and the nickel seems hazy, white vinegar (acetic acid) works well to return the shine. Vinegar will also remove some of the dark spots you'll encounter. I use a terry cloth rag to clean nickel because it seems to have a better abrasive action than does an old tee shirt or soft cotton rag. Dip the rag in the vinegar and apply it to the entire fount. Keep the rag wet and rub in a circular motion, starting at the top and working your way down. Look for dark spots and attempt to rub them off. Once you are finished cleaning, hot rinse the fount to remove the vinegar. Use a metal polish and soft rag to finish the shine.
If the nickel plate does not shine at all, and it feels very rough to the touch, you might need to use a stronger acid. I prefer to use Lime-Away® (sulfamic acid) because it is gooey, sticks to vertical surfaces well and is not as irritating as cleaners with hydrochloric acid. Lime-Away® will eat the nickel plate if you leave it on too long. If you decide to try this method of cleaning nickel, please understand that:
1) it will damage painted surfaces. If you are using it near paint, I recommend you disassemble the lantern first. This would be the case on nickel-plated Coleman lamps as the handle is painted wood. It would be best to remove the burner and then handle before cleaning them.
2) in most instances, brass is the underlying metal. If you see yellowish metal spots on the fount, it means the nickel has been lost. Sometimes dark spots will end up showing plate loss once you clean the dirt and grime from them.
Choose a small area near the bottom of the fount and apply a liberal coat of  cleaner to it. Allow it to sit for about 5 minutes and then gently rub it with a wet rag. Wash it well with warm water. That small spot should feel smoother and have a little bit of a shine now. Unless you note that some of the nickel was removed, try it again in the same spot and allow it to soak another 5 minutes, maybe 10 this time. When you have a smoother finish and a little bit of a shine, use that practice to clean the entire fount. Use a metal polish and soft rag to finish the shine.
Jump to porcelain * glass * painted founts * nickel-plated founts * electrolysis
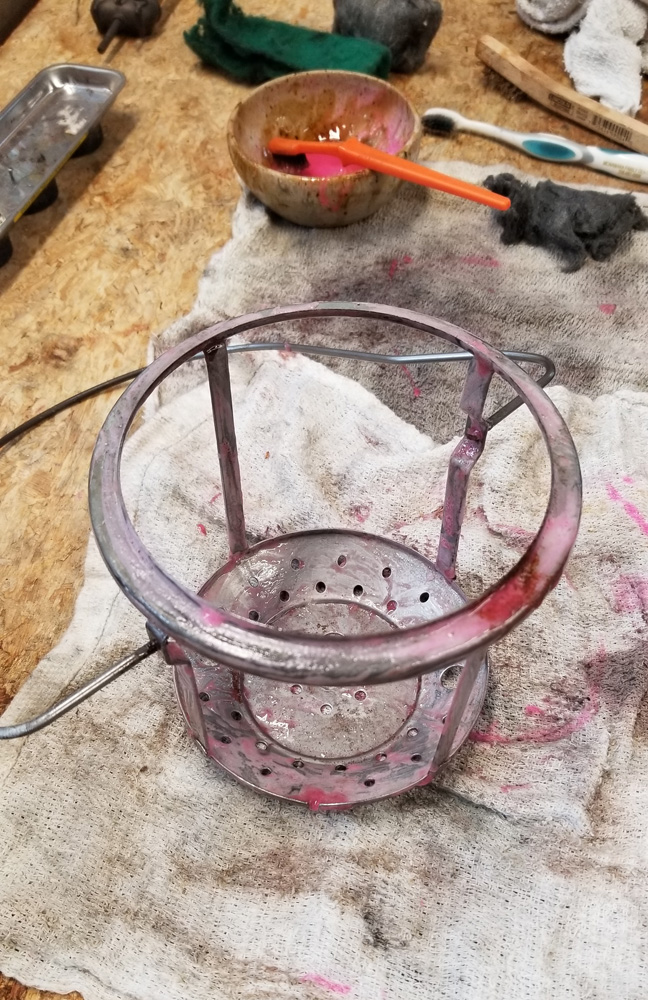
Cleaning bare metal. You’ll probably have rust on your lantern frame or stove manifold, and the brass parts of the burner / valve assembly are probably blackened from years of heat and oxidation. Cleaning bare metal can be challenging but is worthwhile. As I stated earlier, this is much easier to do this when the appliance is disassembled.
Vinegar (acetic acid) and salt will remove rust and grime from steel, and most of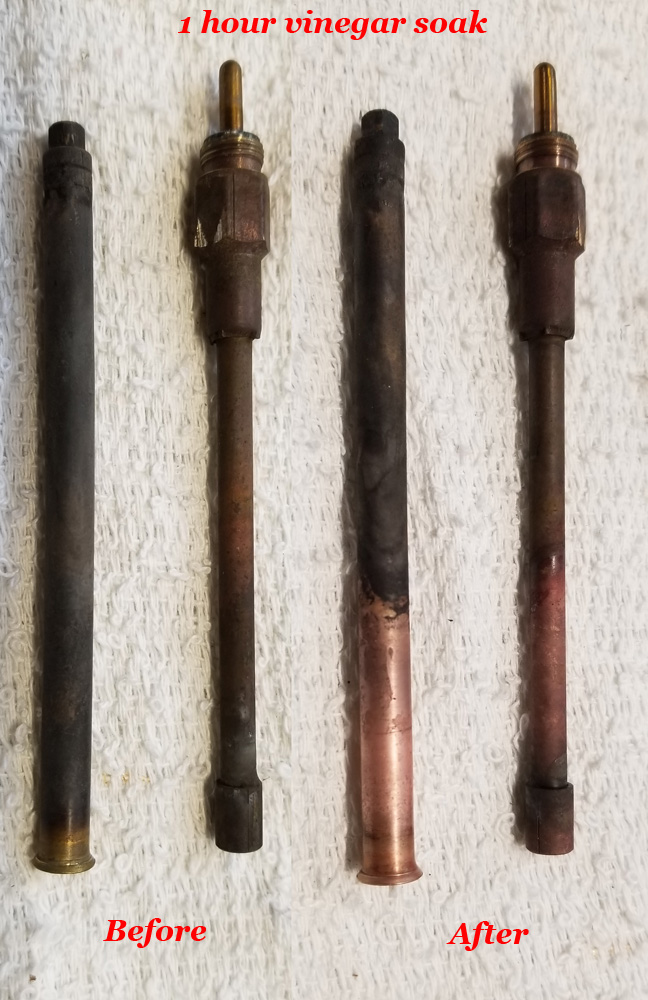 that black soot from your brass pieces. Use a ratio of 1 cup of vinegar and 1 tablespoon salt and heat the mixture to near boiling. Completely submerge the parts you want to clean and allow them to soak for an hour or more. Rinse in warm water after soaking and brush them well with a brass or very stiff brush. Review the results and repeat as necessary. Finish the cleaning with a light oil, Vaseline or WD-40 and 0000 steel wool. Your brass parts may come out of the vinegar with a pinkish tint but that will be removed with the steel wool.
![]() Caution: Never submerge a valve assembly in vinegar or any other cleaning solution. There is at least one graphite packing inside which could be destroyed. To clean a valve with vinegar, brush it on and keep the metal wet. You just don’t want the acid to get to the packing(s).
Caution: Never submerge a valve assembly in vinegar or any other cleaning solution. There is at least one graphite packing inside which could be destroyed. To clean a valve with vinegar, brush it on and keep the metal wet. You just don’t want the acid to get to the packing(s).
 A faster way to clean rusty metal and dirty brass is with naval jelly (phosphoric and sulfuric acid). I like it because its gooey and sticks to vertical surfaces like the struts on lantern frames. It also takes less than half the time vinegar does. Use a tooth brush and spread it over the parts you want to clean, but keep in mind it will ruin paint. Let it set for 15-30 minutes, then rinse it off with warm water. Brush the parts with a brass or very stiff brush to clean them, then use a light oil, Vaseline or WD-40 and 0000 steel wool to shine.
Jump to porcellain * glass * painted founts * nickel-plated founts * bare metal
Electrolysis. Years ago, when I was rebuilding a lot of stoves, I would use 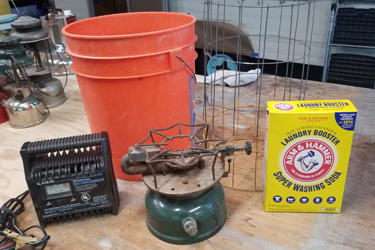 electrolysis to clean grills and burners that were excessively rusty. It is a perfect treatment for pre-60s grills, #500 Speedmaster and Handy Gas Plant burners, etc. You’ll also like the way rusty old Quick Lite lantern frames come clean. This process will destroy paint and plating, and you don’t want to use it on brass or aluminum.
![]() Caution: NEVER place stainless steel in an electrolytic bath. It will produce chromium which is extremely toxic and very carcinogenic.
Caution: NEVER place stainless steel in an electrolytic bath. It will produce chromium which is extremely toxic and very carcinogenic.
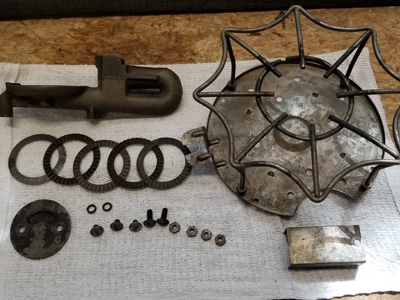
The photos you see are of a #500 stove burner that was extremely rusted and corroded. It would have been impossible to dismantle with penetrating fluid and/or 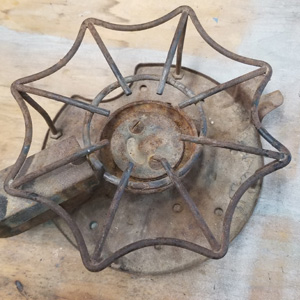 heat and I'm sure I would have broken or stripped every screw. It was soaked in an electrolysis bath for approximately 12 hours. I didn't even have to lean on any of the screws to remove them. They came out like they were installed yesterday.
Electrolysis is using electricity to move rust from the part you are cleaning to another piece of metal. All you need is a standard 12-volt car battery charger, a solution of water and washing soda, a plastic container larger than the part you are cleaning, and a sacrificial piece of steel or iron.
![]() Caution: Electrolysis will produce toxic fumes. Do not use this method without excellent ventilation.
Caution: Electrolysis will produce toxic fumes. Do not use this method without excellent ventilation.
Use an old battery charger, not a new expensive one, as you will burn the negative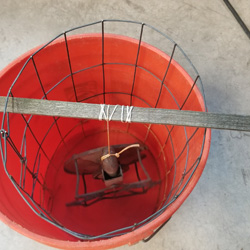 lead in your electrolysis bath. You can find old chargers in thrift stores for pretty cheap. Find one with a 2A/6A switch and use the 2A setting. Don’t try a small battery tender (trickle-charger) as they don’t provide enough current. Don’t use a car battery as they can deliver a deadly amount of current if shorted.
Your anode can be anything like heavy wire fencing, construction reinforcing bar (rebar) or a flat iron bar, all available at the local hardware store. What you use depends on the size and shape of the part you are cleaning. I bend flat bar into a loop to clean stove grills, but I use “pig wire" to completely surround 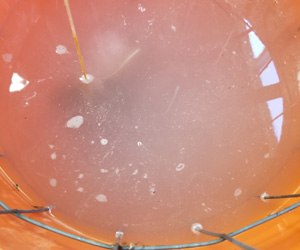 and clean steel lantern frames and burners, as shown in the photos here. You can also suspend your metals and rods vertically in a bucket.
![]() Caution: Regardless of the configuration you MUST ensure that the part being cleaned and the sacrificial anode do not touch.
Caution: Regardless of the configuration you MUST ensure that the part being cleaned and the sacrificial anode do not touch.
Place the metals inside of the plastic container in such a manner where they are near each other, but not touching. Configure them so that the metal anode is near as much of the part to be cleaned as possible. If you were cleaning a rusty old saw blade, you'd want to surround the tool with metal rather than having it be only on one side. The sacrificial metal “pulls” the rust off the part so the more directions it can pull from, the better it works.
 Connect your unplugged battery charger to the part and to the sacrificial metal. If the charger has adjustable current settings, set it for the lowest setting, usually 2 amps at 12 volts. Place the positive red lead to the sacrificial steel or iron anode and the negative black lead to the part you are cleaning. Once these connections are made, check again to ensure that the metals are not touching anywhere.
Next comes the electrolytic solution. The ratio does not need to be precise, about 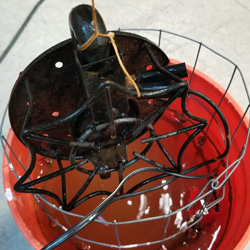 1/8 cup washing soda per two gallons of water works well. Don’t make it too strong as it will be too conductive and may burn up your battery charger. Mix enough solution to completely submerge the part you are cleaning. Mix it well and completely dissolve the washing soda. Sometimes it is better to mix the solution before you pour it into the plastic container, so you don’t disturb the metals and connections you’ve made.
![]() Always wear hand and eye protection. Washing soda can be irritating to sensitive skin. Trisodium Phosphate (TSP) or baking soda can be substituted, results may vary.
Always wear hand and eye protection. Washing soda can be irritating to sensitive skin. Trisodium Phosphate (TSP) or baking soda can be substituted, results may vary.
 With the bath ready to go, check again to make sure the metals are not touching. Plug-in the battery charger and observe your electrolytic solution. Look for small bubbles being produced around the part being cleaned. This should happen within seconds of turning the charger on. If you see this, everything is working as expected.
If you don’t see bubbles, unplug your charger and check your connections. Plug it back and check again. If you still don’t see bubbles, try increasing your current to the 10A setting. DO NOT attempt anything higher than 10 amps. Some battery chargers simply will not perform under these conditions. Try a different one.
Allow your part to bubble for 8-10 hours, or preferably overnight. When you shut  the system down and look at your part, it will have blackened. Clean it well with a metal brush.
Place a coat of oil on it soon after removing it from the bath to keep the rust away. Or, this is the time to paint it if that is what you wish to do. But don't wait because the rusting process will start immediately.
Did you find this information useful? Click here to support the Old Town Coleman Center with a cup of coffee!