


 How to Make a Dual Mode Coleman® Lamp
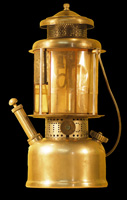
A “dual mode” lamp is one that can run on gasoline (as originally intended) or on electricity, and can be switched from one mode to the other in under a minute.
An electrification project brought to you be Dwayne Hanson of D&D Lanternworks. Enjoy the beauty of a lit Coleman lamp without the smell, heat or concerns associated with burning gasoline / kerosene inside your home.
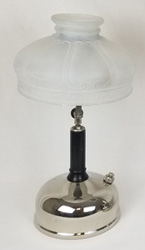
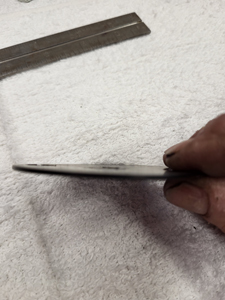
This electrification project can be applied to pressure lamps that use a standard circular shade holder like the one shown here. 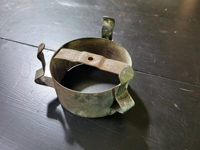
Figure 1 shows the items I purchased for my electric conversion lamps and Table 1 offers a link to the Amazon source for each part. You may already have some of them, but they're provided in case you don't.
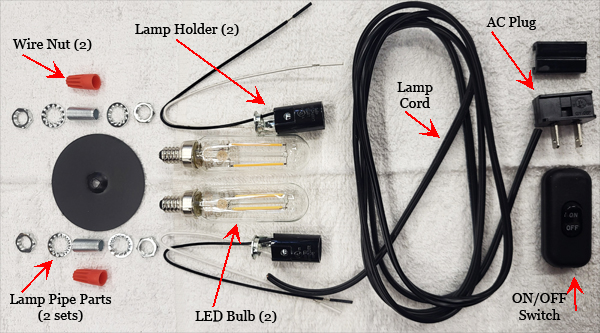 |
Figure 1 |
| Part | Link | Qty Used |
|---|---|---|
| Delete Plate | https://amzn.to/43A2YSM | Good for 2 lamps |
| Wire Nut Kit | https://amzn.to/4j6TVNC | Good for 2+ lamps |
| Lamp Pipe Kit | https://amzn.to/4jSxxsG | Good for 2+ lamps |
| Lamp Holders | https://amzn.to/43zygsX | Good for 2+ lamps |
| Lamp Cord | https://amzn.to/4jUEt8J | Good for 2+ lamps |
| On/Off Switch | https://amzn.to/3YReMxo | Good for 2 lamps |
| AC Plug End | https://amzn.to/43C5g3L | Good for 1 lamp |
| LED Bulbs | https://amzn.to/43qmfF6 | Good for 2 lamps |
Table 1 |
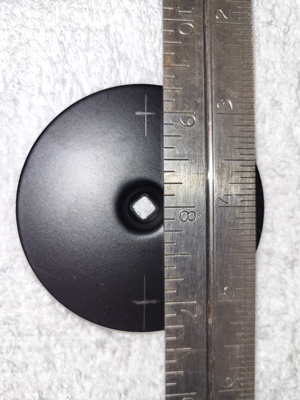
1.1 Prepare the Delete Plate. The delete plate needs to be drilled out to receive the two lamp holders, then flattened.
The plate has an outside diameter of approximately 2 5/8". Place a rule across the center of the plate and draw a line passing through the center. Measure 1" out from center in both directions and mark these points as shown in Figure 2.
The location of these two holes is pretty important. If they are too close to the center of the plate, they won't fit on your lamp. If they're too far apart, you may break through the edge of the plate with the last drill bit.
Starting with a very small (1/16") drill bit, drill two holes in the delete plate at the location of your 1" marks. Progressively enlarge the holes out to 3/8" bit (Figure 3).
 |
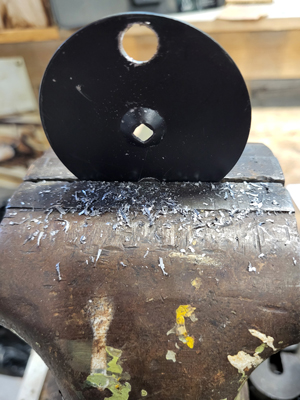 |
Figure 2 |
Figure 3 |
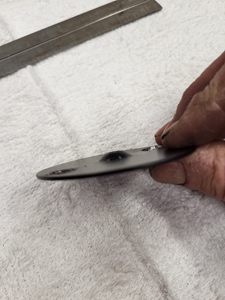
With the lamp holder holes drilled, you can flatten the delete plate. Using a hammer and/or vice, beat the stuffins out of the center rise to remove it as shown in Figures 4 and 5.
Flattening the plate may cause the center hole to become smaller. Drill this hole out to 3/16" which will allow the shade holder stud to pass through it (Figure 6).
 |
 |
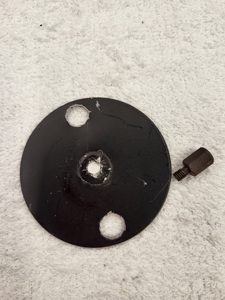 |
Figure 4 |
Figure 5 |
Figure 6 |
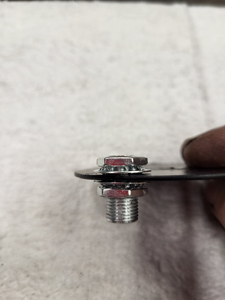
1.2 Install the Lamp Pipes. Use one 3/4" long pipe, two washers and two nuts for each side. Install them in such a manner where the excess threads extend down from the delete plate on only side only (Figure 7). Once installed, snug them with a wrench.
Once installed, the washers and nuts should not exceed the outside diameter of the delete plate (Figure 8).
 |
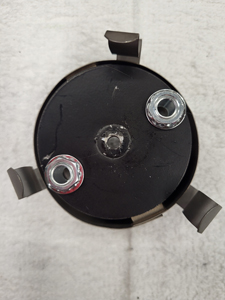 |
Figure 7 |
Figure 8 |
1.3 Install the Lamp Holders. The side of the delete plate with the excess thread is the bottom side. Pass the two wires from the first lamp holder up from the bottom through the lamp pipe. Thread the lamp holder onto the pipe and snug it up against the nut (Figure 9). Do the same for the other side.
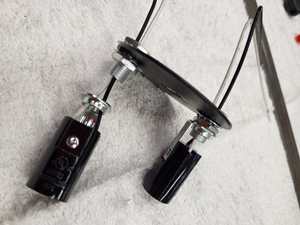 |
Figure 9 |
1.4 Connect the Wiring. Strip the insulation back from both conductors of both lamp holders, and also from one end of your lamp cord. Expose approximately 1/2" of wire as shown in Figure 10.
Twist together one of the stripped ends of your lamp cord with BOTH of the white wires from your lamp holders. Install an appropriately sized wire nut and tighten. Tug on all three wires to ensure a tight connection. Do the same for the other lamp cord conductor and BOTH black wires as shown in Figure 11.
 |
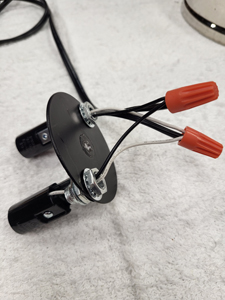 |
Figure 10 |
Figure 11 |
Determine the length of your lamp cord and cut it. A length of 5 or 6 feet should suffice.
Install the AC plug to the distant end of the lamp cord as shown in Figure 12.
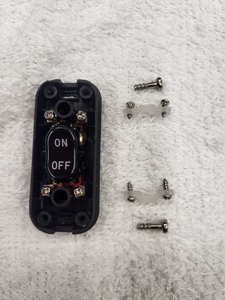
Determine where you'd like the ON/OFF switch (Figure 13) to be and cut the lamp cord at that location. Split the conductors, strip them back and install them on both sides of the switch as shown in Figure 14.
If you have an ohm meter, confirm that you have infinite resistance between the two prongs of the plug. If there is a short in your wiring you'll blow a breaker rather than lighting the bulbs.
 |
 |
 |
Figure 12 |
Figure 13 |
Figure 14 |
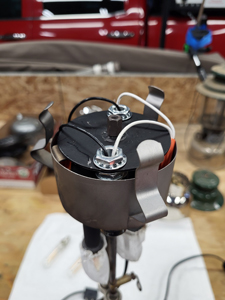
1.5 Install the Assembly on your Lamp. You should have everything ready to install as seen in Figure 15.
Take the plug end of your assembly and feed it through the top of the shade holder as shown in Figure 16.
Bend the wire nuts downward and tuck them under of the delete plate, then place it on top of the shade holder as shown in Figure 17. The wire nuts won't be visible if they are mounted under the delete plate.
 |
 |
 |
Figure 15 |
Figure 16 |
Figure 17 |
Set the shade holder and your electrical assembly on top of your lamp burner. Put the mounting stud through the center hole and tighten with a wrench (Figure 18).
Install the light bulbs into their sockets (Figure 19). They will be a tight fit--take your time.
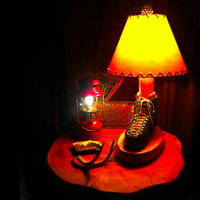
Install the shade, plug everything in and turn the switch on. Enjoy, as shown in Figure 20!
 |
 |
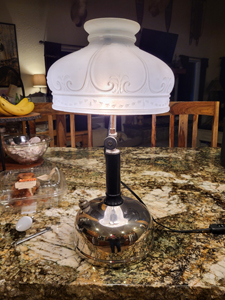 |
Figure 18 |
Figure 19 |
Figure 20 |
Did you find this information useful? Click here to support the Old Town Coleman Center with a cup of coffee!