 Want to know
 Rebuilding Coleman® Two or Three Burner Stoves
If you are not mechanically inclined or are not comfortable working on fueled appliances, I encourage you to send your lantern or stove back to Coleman® for repair. Click here for more information.
Access to and use of this information constitutes your agreement with our Terms and Conditions. The material presented here is for informational purposes only.
Forward. These instructions were written specifically for Coleman® two and three burner camp stoves, but they can also be used to repair other appliances like Hot Plates, Air-o-Gas Ranges, Trailer/Cabin Stoves and a host of pressure stoves made by other manufacturers.
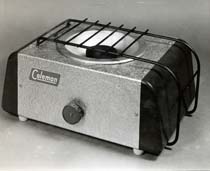
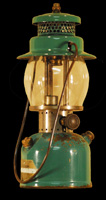
The stove used in this instruction is a common Coleman® model 413E, in the standard “good used” condition often found at garage or yard sales. Don’t worry if you see a photo of a lantern as some parts are the same.
I encourage you to read the instructions in their entirety before starting. If you would like a better understanding of how lamps and lanterns work, visit the Old Town Learning Center.
 The video version of these instructions can be found here.
Scope of Repairs. These instructions are written for a “full” rebuild, but not all stoves will require that level of service. You don’t want to remove the check valve unless you absolutely must, and you may not need to destroy a perfectly good valve stem packing. You'll be cautioned before starting any step that may not be necessary.
If the stove has not been used in many years, or it is obviously worn out, I recommend you tear it apart for a full rebuild. If the stove is in near-new condition or was obviously well cared for by the previous owner, you might be able to get away with a good cleaning.
Replacement parts. Most of the parts can be cleaned and reused, but not all of them. Purchase the necessary replacement parts before starting work whenever possible.
Click here to view an exploded parts view for two or three-burner stoves.
Parts you should always replace, or at least have one spare:
1. Fuel Filler Cap (or gasket)
Parts that may be required:
1. Pump cup
2. Valve stem packing4
3. Check valve and air stem
4. Generator
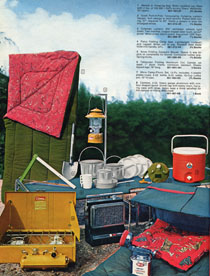
Tools & Supplies. The following table lists the tools and supplies used during these instructions.
| Fire extinguisher | Denatured alcohol |
| Eye protection | Evaporust® or similar |
| Bench Vise | White vinegar |
| 5/16”, 1/2" end wrenches | Household cleaners |
| 7/16” Nut driver or 7/16" socket w/extension |
Cotton swabs |
| Small/med flat-tip screwdriver | Soft rags |
| Hammer | Rubbing compound |
| Slip-joint and needle-nose pliers | Polishing wax |
| Various soft & wire brushes | Carburetor cleaner |
| Flashlight | Penetrating fluid |
| Propane torch | Naval jelly |
| Length of clear tubing | 0000 Steel wool |
| Silver paint (if desired) | Neatsfoot (preferred) oil |
| Compressed air | WD-40 or similar |
![]() What happens if you get stuck? You can try to track me down on the Old Town Coleman Center Facebook page, or you can always get a fast answer on the Coleman Collectors Forum.
What happens if you get stuck? You can try to track me down on the Old Town Coleman Center Facebook page, or you can always get a fast answer on the Coleman Collectors Forum.
Pictures. Take photos of your stove before starting. During reassembly, you will be able to refer to the pictures should you have any questions about how something was positioned. “Before & after” photos of the rebuild are always fun to see and look back on.
Good luck, and keep that fire extinguisher close by! -Frank